


At Casey Printing, we always try to bring you the best tips, best practices, advice and industry information, but every now and again you need to break it back down to the basic 'how to' tutorial post. So today we're going to go over the basics of how to create a trifold brochure in InDesign.
Before we get started, download the trifold brochure InDesign template and follow along. You may also want to reference our 10 Pro Tips for designing a brochure that gets results.

Determine Your Finished Size
The first thing you want to establish with any design is your finished size. How big do you want the brochure to be? For today's example, we're going to be using a standard letter-sized (8½ x 11 inches, 51p0 x 66p0 picas, or 215.9 x 279.4 mm) sheet as our parent sheet. We will also want a ⅛ inch (0p9 or 3.175mm) bleed so our color can go right up to the edge. This means that our finished size will be 8¼ x 10¾ inches.
Create Your Document
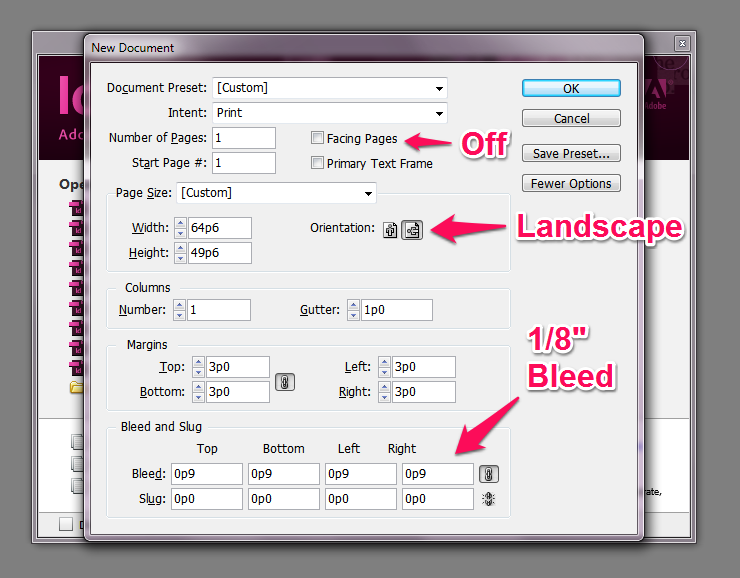
Let's create a new document in InDesign. You'll want to set the document's width to 10¾ inches, the height to 8¼ inches, and the orientation to Landscape (the icon with the little person image on it's side). You'll also want Facing Pages to be turned off and your bleed set to ⅛ inch. The rest of the settings can be left as they are.
Find Your Folds
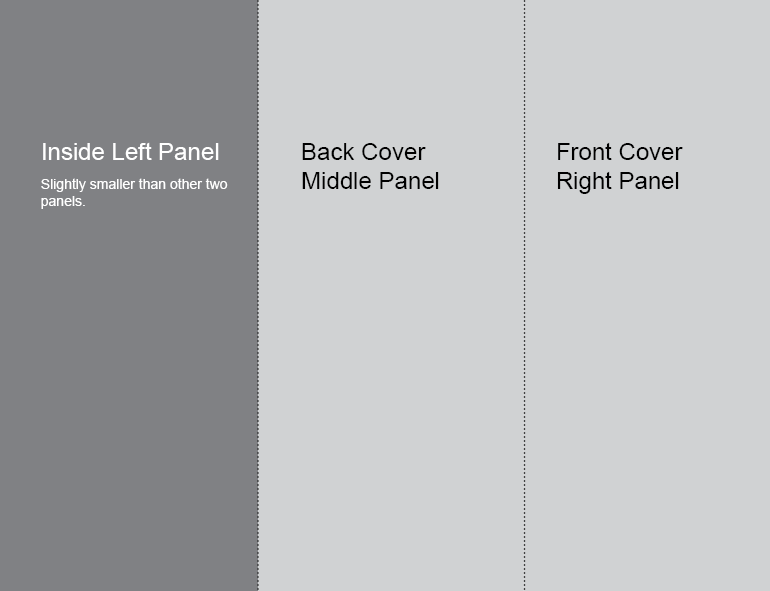
Next step is to figure out where the folds are. This step can be tricky since, despite what some may think, all three panels are not the same width. The inside panel must be narrower than the other two panels for it to tuck in properly. So here's where we get into the math: Divide your finish width of 11 inches (or 66 picas) by 3, take away ⅛ inch (9 points) from the inside panel, and add half that to the other two. The result will be two panels that are 3.6875 inches (22p1.5 picas) and one panel that's 3.625 inches (21p9 picas). As you may have noticed, the numbers are much more manageable in Picas.
Create Your Guides & Margins
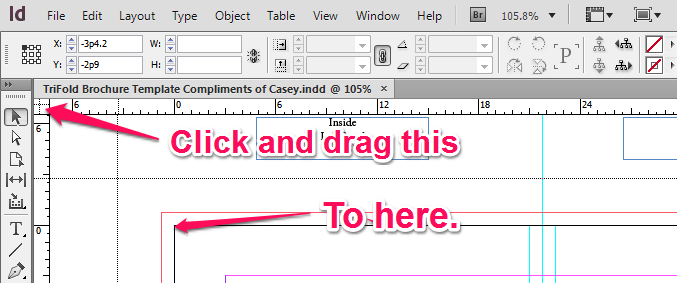
Now that we know where our folds are, let's create our margins. Fist, set your zero point on the upper-left corner of the trim by dragging the box in the upper-left corner of your rulers to that point. Now that our zero point is set, let's set our guides on the first “page” at 3.625 and 7.3125 inches (21p9 and 43p10.5 picas), and on the second page at 3.6875 and 7.375 inches (22p1.5 and 44p3 picas). Now we've established where our folds are.
InDesign's default margins (the purple box) of ½ inch from the trim are a good standard, but if you want to tighten this up to ¼ inch you can.
Finally, create a guide ¼ inch (0p9 picas) before and after our “fold” guides.
Be a Rock Star!
There you have it: an honest to goodness trifold brochure! Amaze your friends and (especially) your printer, and don't forget to save! You can use this method for creating larger brochures, too. Just get out your calculator and be the rock star I know you are!