


Ever need to nail something in with the flat side of a wrench? Word Online is definitely not the recommended tool for doing high-level graphic design, but sometimes we need to work with the tools (and the budget) that we have. So to help you with that, I'm going to show you how to create a trifold brochure using Microsoft's free Word Online tool. If you have the Adobe Creative Suite, I recommend you have a look at our InDesign tutorial.
A little background: Word Online is Microsoft's competitor to Google Docs, and has much of the same functionality, look and feel as their flagship Office 365 offering. Of course, there are limitations when compared with their premium offering, but all in all, Word Online is a pretty solid app for quick edits, outlines, or for those who just don't require the advanced functionality of 365.
Getting Started
TIP: Before you get started, you may want to have a look at our 10 Pro Tips for designing a brochure that gets results. Doing this first will help you outline exactly what information you want in the brochure and how you'll want it to be presented. Moving on...
First thing to note is that, unlike the Word desktop application, Word Online can not create columns, and building tables in Word Online is extremely limited. For this reason, it is highly recommended that you first download a free template from https://templates.office.com/. The templates will download as a .dotx file which, unfortunately, Word Online is not compatible with. So you will need to convert this file to a .docx or .odt file using either the Word desktop application (I know, I know), or an alternative like LibreOffice wich can be downloaded at https://www.libreoffice.org/. There's also free online converters you can use, such as the one at https://convertio.co/dotx-doc/.
The reason this works is that, although Word Online can not make columns or complex tables, it will preserve any columns or complex tables already present in the file you upload. Note that because of the limitations in Word Online, not all templates will work as expected. Don't be afraid to try a few different ones out.
Uploading Your Template
Once you've chosen and converted/downloaded your template, you can now upload it to Word Online. To do this, use the following steps:
- Go to https://www.office.com/ and login with your Microsoft account. If you do not have one yet, you can sign up for a free account at this point.
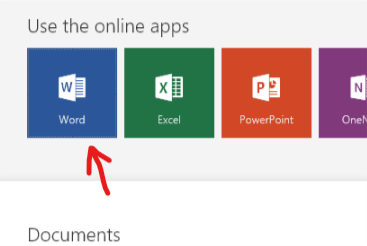
- After you login, choose "Word" under the "Use the online apps" heading.
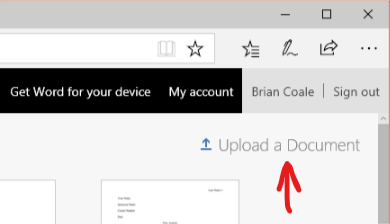
- Next, upload your template using the "Upload a Document" link in the upper-right corner.
Once the file has been successfully uploaded, it should immediately open in the Word Online interface, ready to edit.
Editing Your Template in Word Online
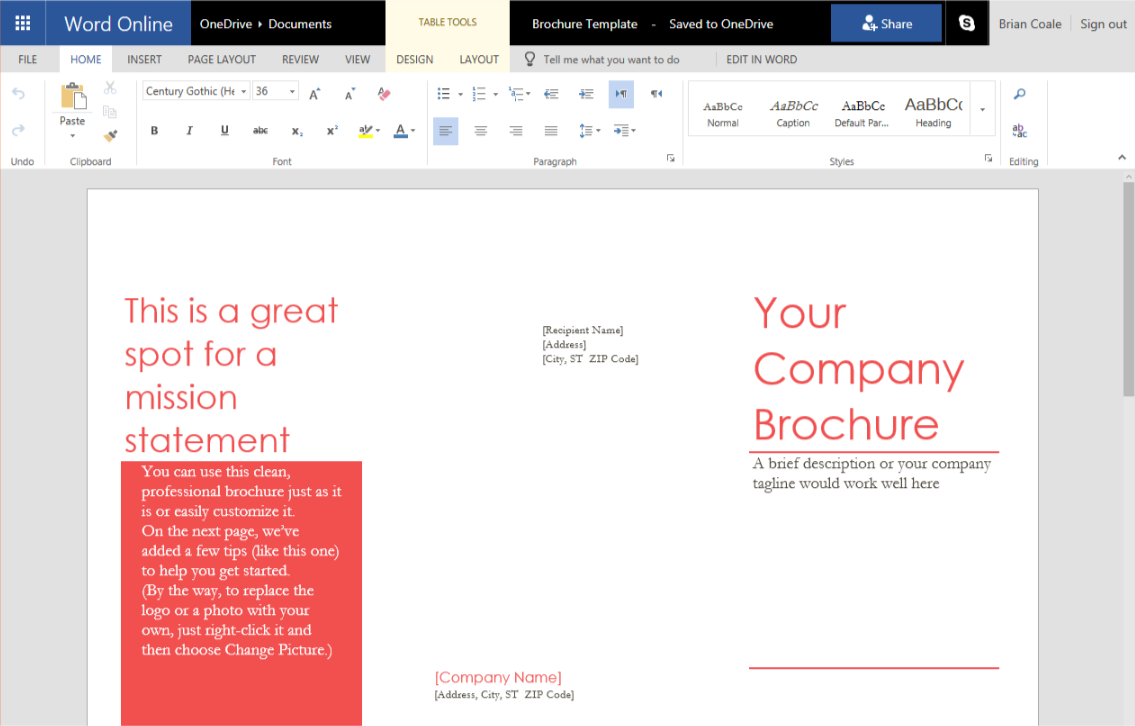
One of the nice things about the templates you download from Microsoft's free template repository, is they typically have tips on how to organize your content built right in. For instance, it'll show you where the logo, title, mission statement, mailing info, etc should go. Of course, these are just suggestions, and you can break away and do your own thing. Just keep in mind that the editing tools in Word Online are a bit limited, so try to keep it simple.
Editing Text
To change the sample text provided by Microsoft to your own messaging and branding, simply click inside the text you want to change and start editing. Pretty much the same basic experience you would get in desktop version, just a little bit simplified.
Using Custom Fonts
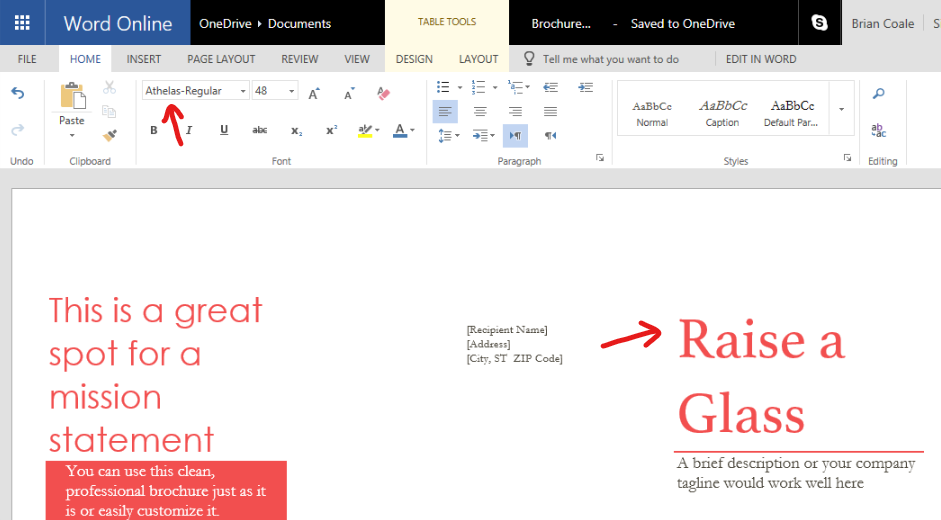
Word Online comes with its own set of fonts, and by default will not use any of the fonts on your system. However, you can instruct Word Online to use a font installed on your system by typing in the system name of the font directly into the font selector. For instance, here I typed in the TypeKit font Athelas-Regular. Since the font exists on my computer, it displays in Word Online.
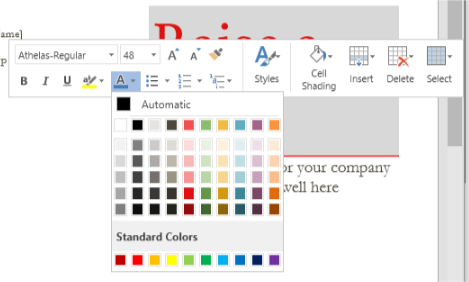
Using Custom Colors
For my fictional wine company, this salmon color is a little off-brand, so I'm going to customize the color. To do this I can select the text I want to change, and click the font color palette that pops up over the text I just selected, or by clicking on the same palette in the ribbon menu at the top of the page. Unfortunately, unless it was included in the template, Word Online does not allow you to create custom colors that are not in the default palette. So for now, I'll make do by choosing the color that best matches my brand colors.
Now that we've updated our text colors, let's do something about the other elements in this template. Remember that, even though you may not be able to see the borders, all of the content in our brochre template is placed within tables. So to change the background color of the box of text next to the mailing panel, we can right-click anywhere inside the cell and choose Cell Shading.

Now we have another problem. The template I used for this tutorial has a line underneath the text on the cover page. This was accomplished by adding a border color to the cell that contains the headline text. Unfortunately, Word Online doesn't seem to have a way to edit these borders. So our best bet for dealing with this issue, is by not having them at all. To remove the borders, select the entire column. With the column selected, click the Table Layout icon under Table Tools > Design.
![]()
If you want to insert a new border with a color of your choice to replace the ones you just removed, right-click the cell above the area you want to place the border, then click Insert > Insert Below. Then you can use the Cell Shading properties mentioned previously to color it, and the font size inside the cell to control the height.
Using Images
So now that we have our colors and our text the way we want them, we might want to sprice up our brochure with a few images. Before we do that, I want to save you a bit of frustration by asking you to keep the following in mind:
- Images uploaded to Word Online should be saved in the RGB color mode, and be sized to fit the cell you're placing them in. This is because, although Word Online has the ability to resize images, it is extremely limited when it comes to how large of images it will allow you to upload.
- Remember that Word Online is very limited when it comes to manipulating tables, and it also seems to have limited & unreliable undos.
- Given the above, it might be a good idea to save a copy in OneDrive before getting serious about layout changes and adding images
Now that the disclaimers are out of the way, let's upload an image! Click inside the cell in which you would like to add your image, and select Insert > Picture. Once the image appears in the cell, you can scale it and move it around if you need to.

Printing Your Brochure
By now your brochure should be shaping up, and you may want to have a look at it in paper. You can print directly from Word Online by going to File > Print, but I recommend exporting yur document as a PDF first, since this is what you'll be sending to your printer. To do that, you can go to File > Save As and select Download as PDF.

Wrapping it Up
After using your downloaded PDF to proof your new brochure, make any necessary changes, download PDF, proof and repeat until your brochure looks the way you want it to look. Once you have your final PDF, let your print provider have a look at it to make sure all of your folds, mail panel, etc are in the right places and are OK to print.
If you want to get an idea of quanitities and pricing, you can have a look at the brochures product page on our online store by clicking the Get Pricing button below. Just choose your quantity and select Letter Fold (Tri-Fold) under folding options to get instant pricing and shipping estimates. If you become frustrated working with Word Online, and you want help, or if you need a custom quote, you can hit that Talk to an Expert button.


I hope you enjoyed learning how to create a trifold brochure in Word Online! If you have any questions or comments, please feel free to sound off in the comments section below.
Cheers!