
When you're creating a layout for a flyer, magazine, brochure or even a business card, it's extremely important to to know where your content is so that it doesn't get too close to the edge or partially cut off. This can be difficult since the view on our screen can be very different than what we see on the final product. This is where guides, rulers and margins come in handy. You set a margin based on a real-world acceptable minimum distance from the edge, then keep your content inside that margin. Doing this will save you a lot of time and reliably result in better layouts.
So how do we set margins? Well the basics are the same no matter what software you're using, but there are some software-specific steps that we'll cover in this article. For practical purposes, we'll limit this article to the three major Adobe programs commonly used for print layouts: InDesign, Illustrator and Photoshop. Let's get started.
The Basics
Before you fire up your favorite Adobe program, we should get a real-world reference for where we want our margins to be. One easy way to do this is to grab a sample of a design you already like and measure its margins This will give you valuable perspective on how large your margins should be. You can see in the image below that the business card I measured has roughly a quarter-inch margin. An ⅛ inch to ¼ margin is pretty standard for a business card, but how big you make your margin depends upon how much space you would like to have around your content. If you put a ruler to and actual printed product, it'll give you a much better idea of how big your margins should be.

Now we'll jump into software-specific methods for setting up margins in your Adobe document. If you like, you can jump down to the heading that matches the software you're working with.
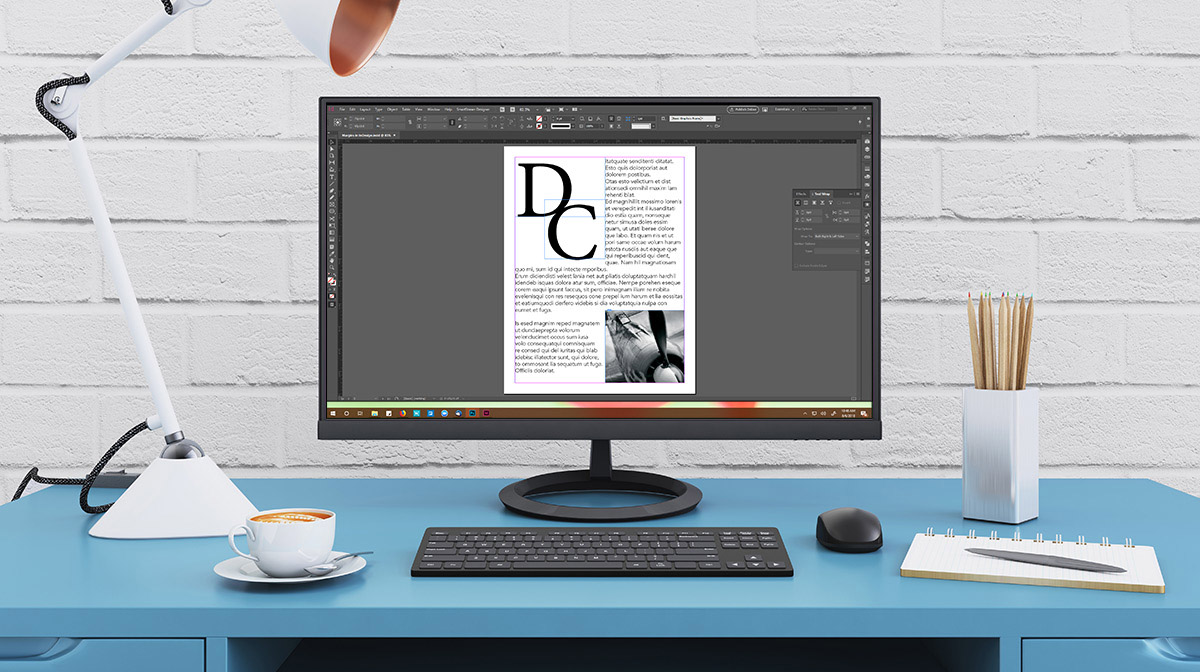
Adobe InDesign
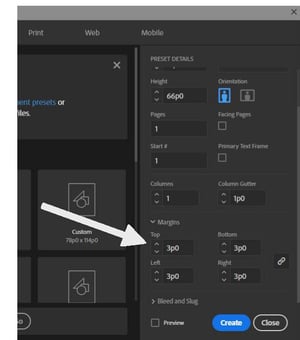
One of the nice things about InDesign is that margins are built right into the page by default. When you're creating a new document, InDesign typically defaults to a margin of 3p0 Picas (or ½ inch), but you can change this in two places:
- When creating your document, if you scroll down to the bottom of the Preset Details, you can set your margin there.
- After your document is created you can go to Layout > Margins and Columns and set your margins there.
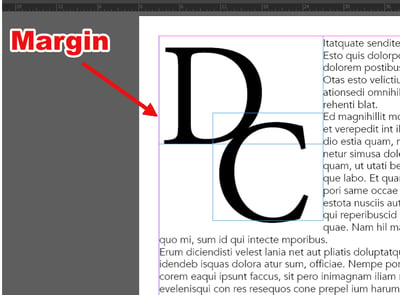
Once your margin is setup in InDesign, you'll see a purple box on your page. This is your margin. Keep all your important content inside this box and you'll be good to go!
Adobe Illustrator
In Illustrator you don't have built-in margins the way InDesign does, so instead you can use guides. Using guides in Illustrator takes a little more setup than margins in InDesign, but it's still pretty easy once you get the hang of it. Just follow these steps:
- First, activate the Rulers by going to View > Rulers > Show Rulers or by using the CTRL+R hotkey (COMMAND+R on OS X).
- You may also want to right-click on the rulers and select you're preferred measurement unit (e.g. inches, Picas, millimeters, etc)
- From the corner where the vertical and horizontal rulers meet, drag the cursor to the upper-left corner of the Artboard. This will set the upper-left corner as the zero point. Illustrator might do this by default when you create a new document, but it's a good habit to learn, especially for multiple Artboards.
- In the Transform panel, make sure the upper-left box is selected for your orientation
- Put your cursor over the vertical ruler and drag your first guide into place
- Do the same for the horizontal ruler
Now we have some guides, but as you may have noticed it's kind of hard to be very precise about where you place them. If "close enough" is good enough you can stop here, but if you need more precision follow these steps:
- Unlock the guides by going to View > Guides > Unlock Guides or by using the ALT+CTRL+; hotkey (ALT+COMMAND+; on OS X).
- Now select a guide. In the Properties or Transform panels set the X or Y to the desired location (X for vertical ruler, Y for horizontal ruler).
- Once you have the guides set you can re-lock them the same way you unlocked them.
Have a look at this brief video to see the above steps in action:
Now you have guides in Illustrator that can be used as your margins.
Adobe Photoshop
The margin workflow in Photoshop is similar to that of Illustrator, but is maybe a little more straightforward. To setup guides to use as margins in Aodbe Photoshop, follow these steps:
- With your document open and active, go to View > New Guide.
- In the New Guide dialog window, choose Horizontal or Vertical, depending upon which type of guide you would like to create.
- Enter a Position.
Note that the measurement used in the position field will be the same as the measurement used by the rulers. You can change the measurement used by the rulers by right-clicking a ruler and choosing your preferred standard. Positions will always be measure from your zero-point, which can be changed by clicking and dragging from the area where the horizontal and vertical rulers intersect.
Just as in the other programs, stay inside your margins and all your text and images should be safe from being trimmed and look great.
There are many other factors that play a part in creating a great print product. If you'd like to learn more about them, have a look at How to Prepare Your Files for Print.
Hope you enjoyed learning about setting up margins in your Adobe documents. Of course, if you're having trouble,  . If you have any questions or would like to add your own tips for adding margins to Adobe documents, sound off in the comments below. Thanks for reading!